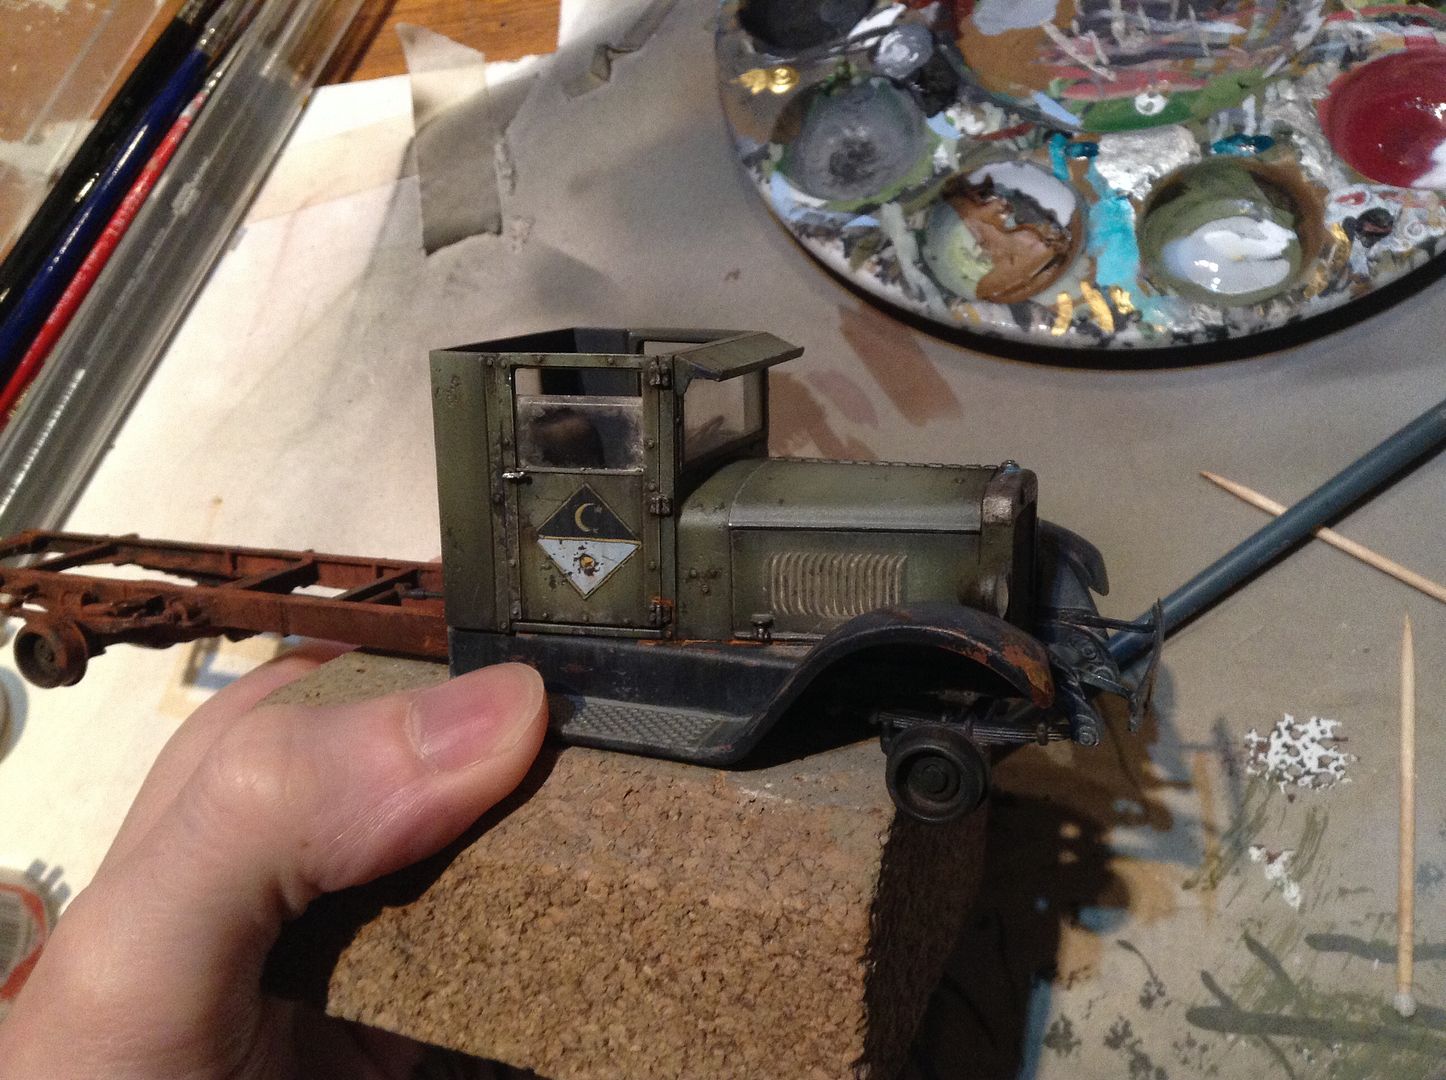
I've made some pretty good progress on the truck so far, I'm quite far into the weathering stages and thought it would be a good time to show you a little tutorial of a technique I call salt mapping.
Salt Mapping is a variation of a traditional armour modelling technique called salt masking, which is used to represent areas of worn paint showing through to the undercoat or bare metal of a tank. The masking technique is a great way to add randomness and detail to flat areas, but i've never really found much use for it in my models. My take on the technique though uses semi-transparent layers to create random patches of dirt and dust on a surface, while still letting the essence of the underlying layers show through.
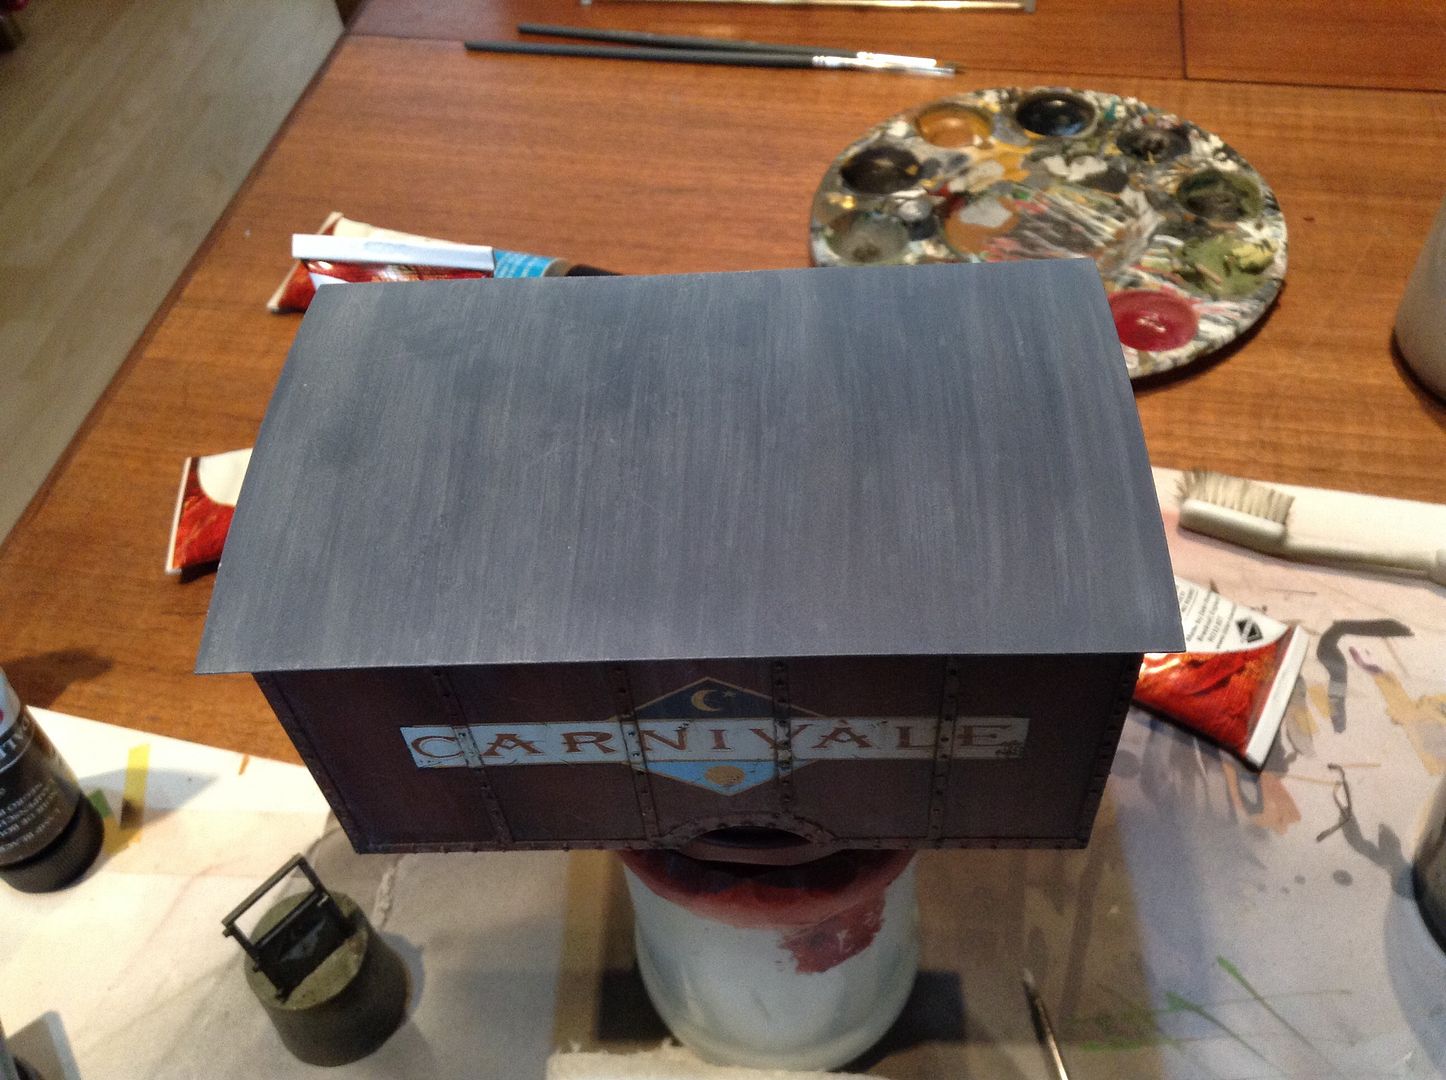
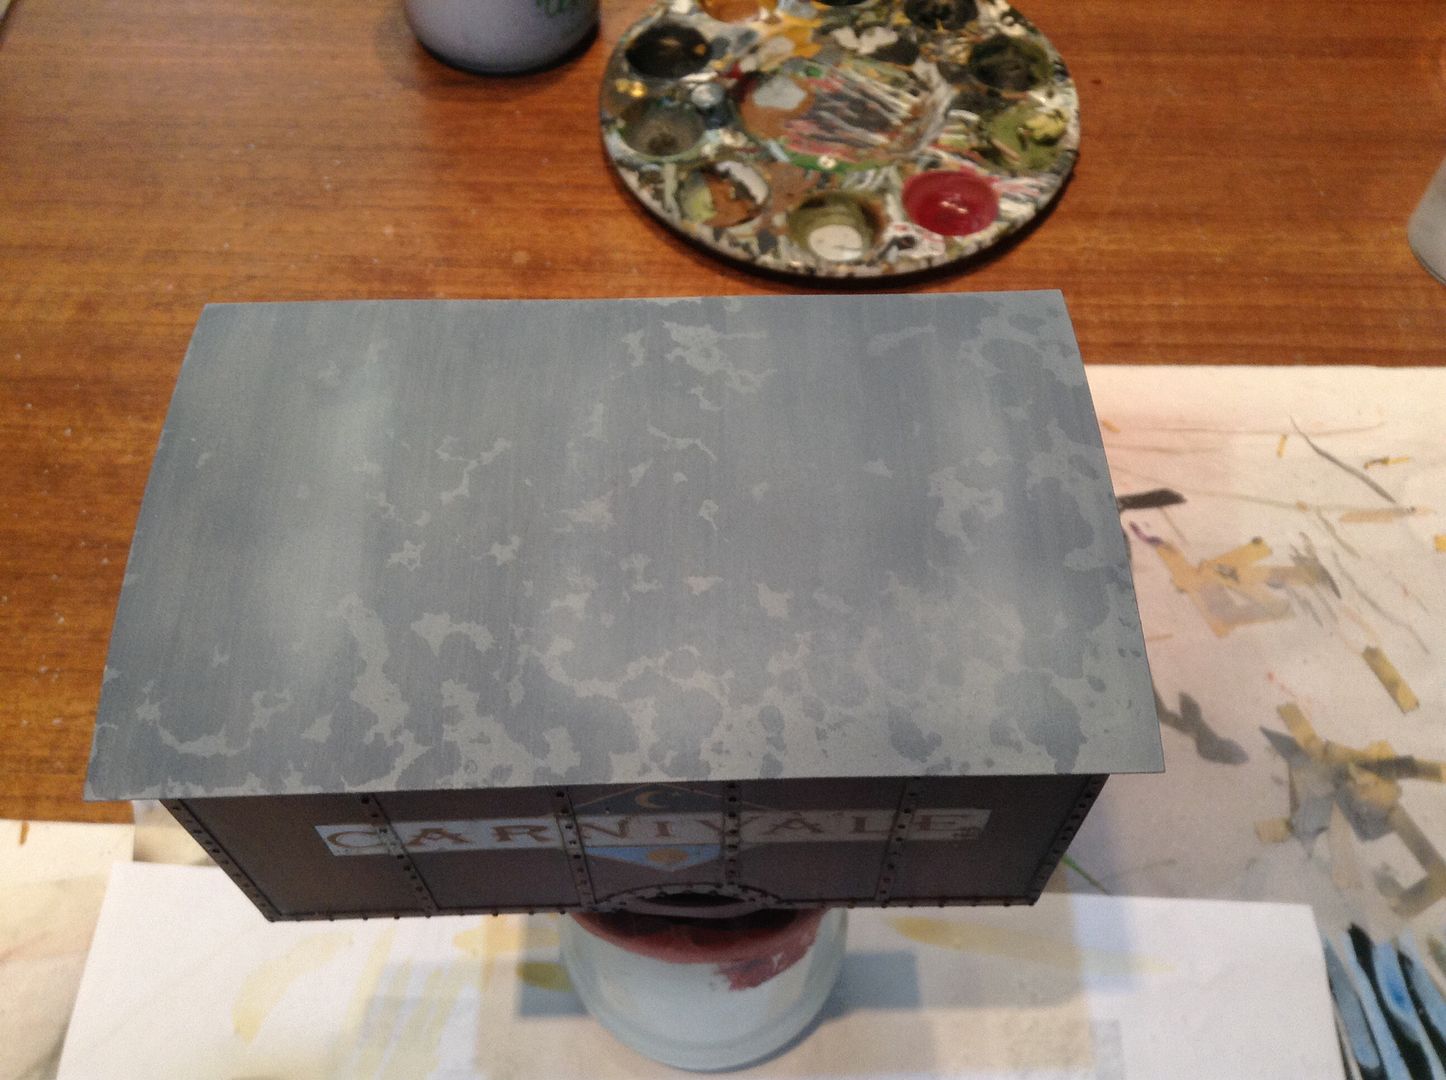
In the first photo the truck roof has been patchily airbrushed and given an all-over streaking with off-white oil paint and white spirits, then left to dry. This provides a nice varied base for the rest of the weathering.
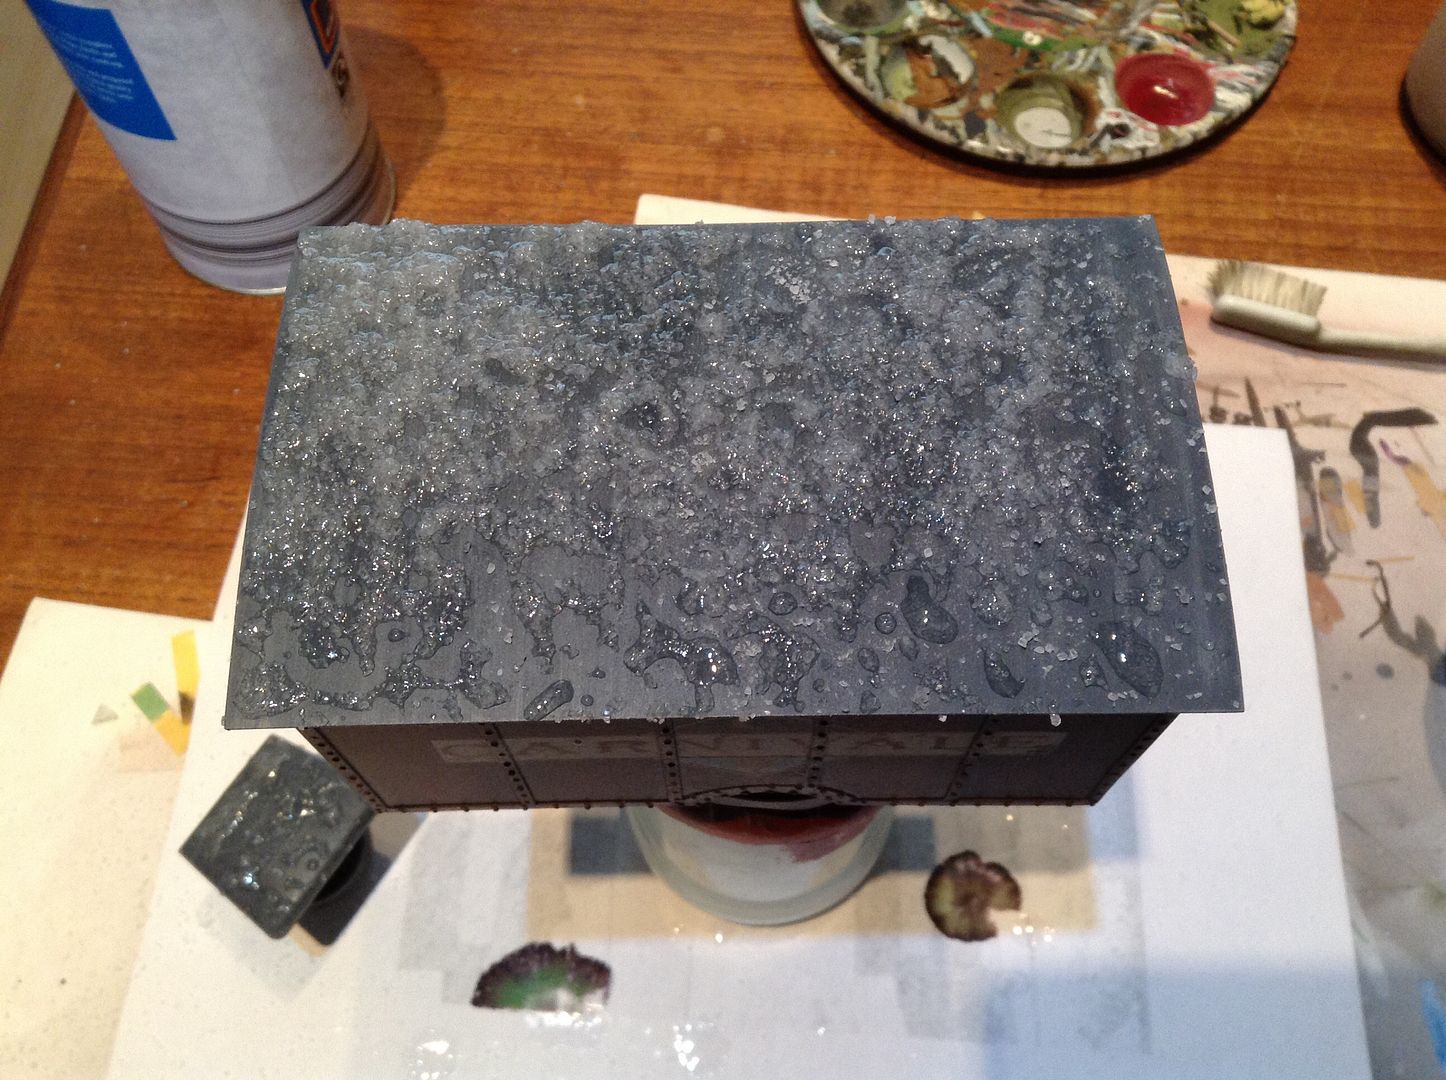
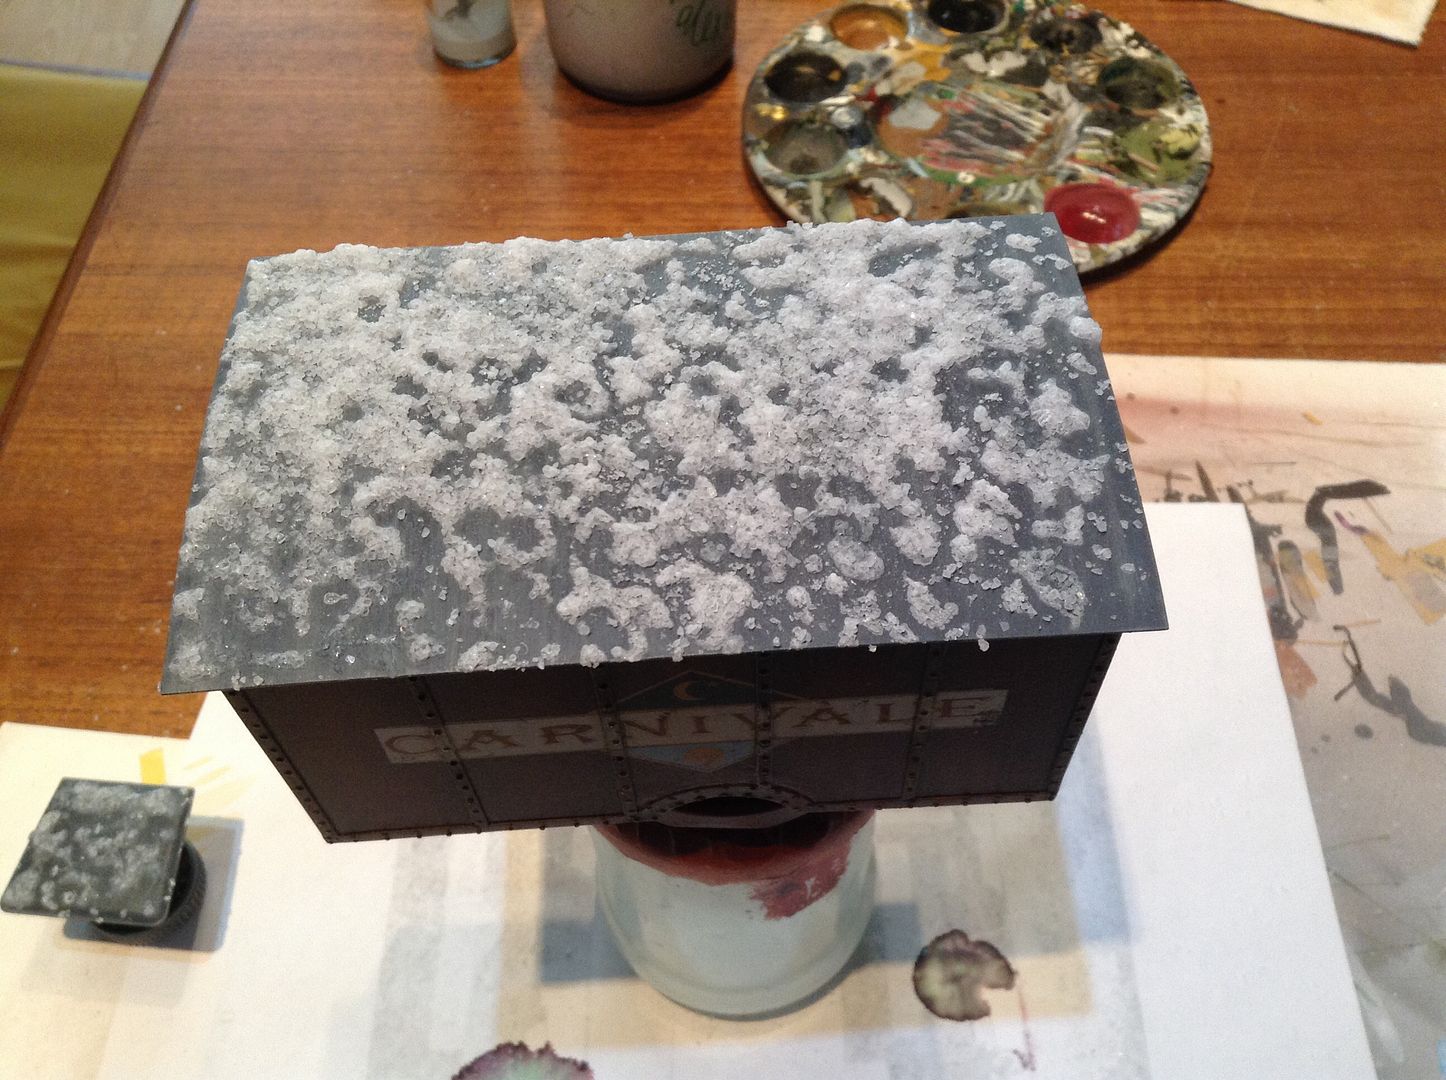
Next the whole roof has been coated with luke-warm water and sprinkled heavily with salt. The painted surface repelled the water a bit and made it gather in droplets, but this all adds to the random effect that I'm going for here.
As the water evaporates, the salt forms crusty patches which loosely adhere to the roof surface. Be delicate when handling the model from this point onwards, you don't want to accidentally knock off your newly formed crystal masks. At this stage, if you don't like what you see you can purposefully detatch areas of the salt with your finger or a wet brush.
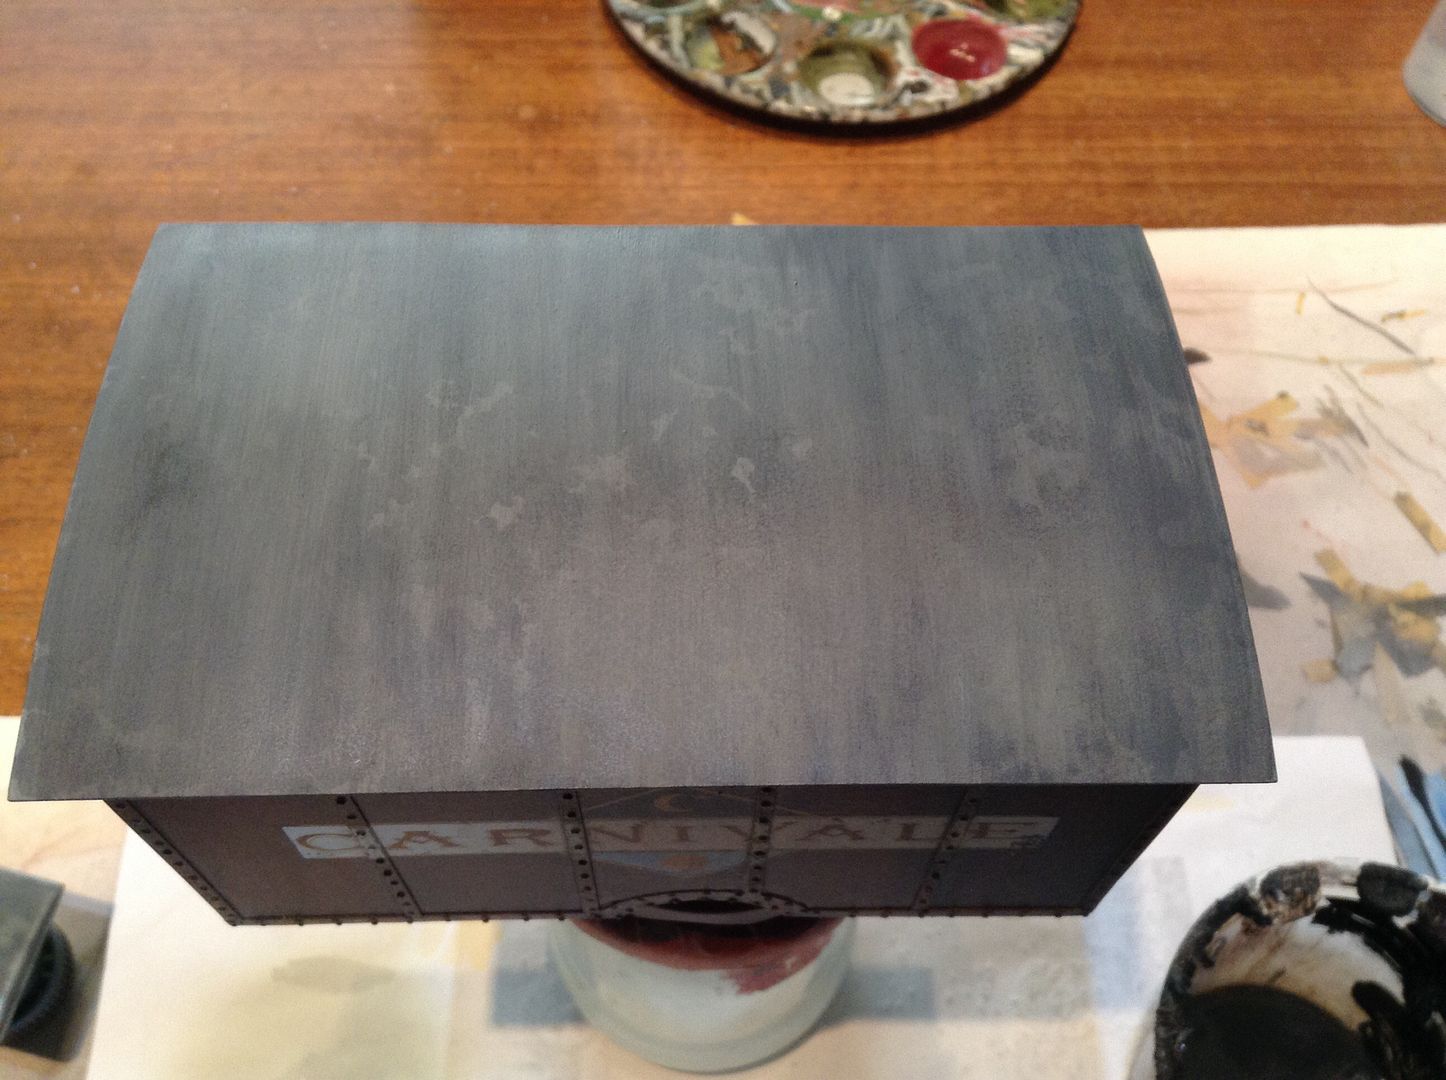
Now that the water has fully evaporated (I hurried things up with a few blasts from my wife's hairdryer... shhh, don't let her know I stole it again) you can gently spray a semi-opaque layer of paint with your airbrush. I used a mixture of Vallejo Buff and London Grey, mixed with some glaze medium and water. Try to spray as gently as you can, and don't let the layers build up too much- the aim is to get a dusty, transparent layer, not a solid coat of paint.
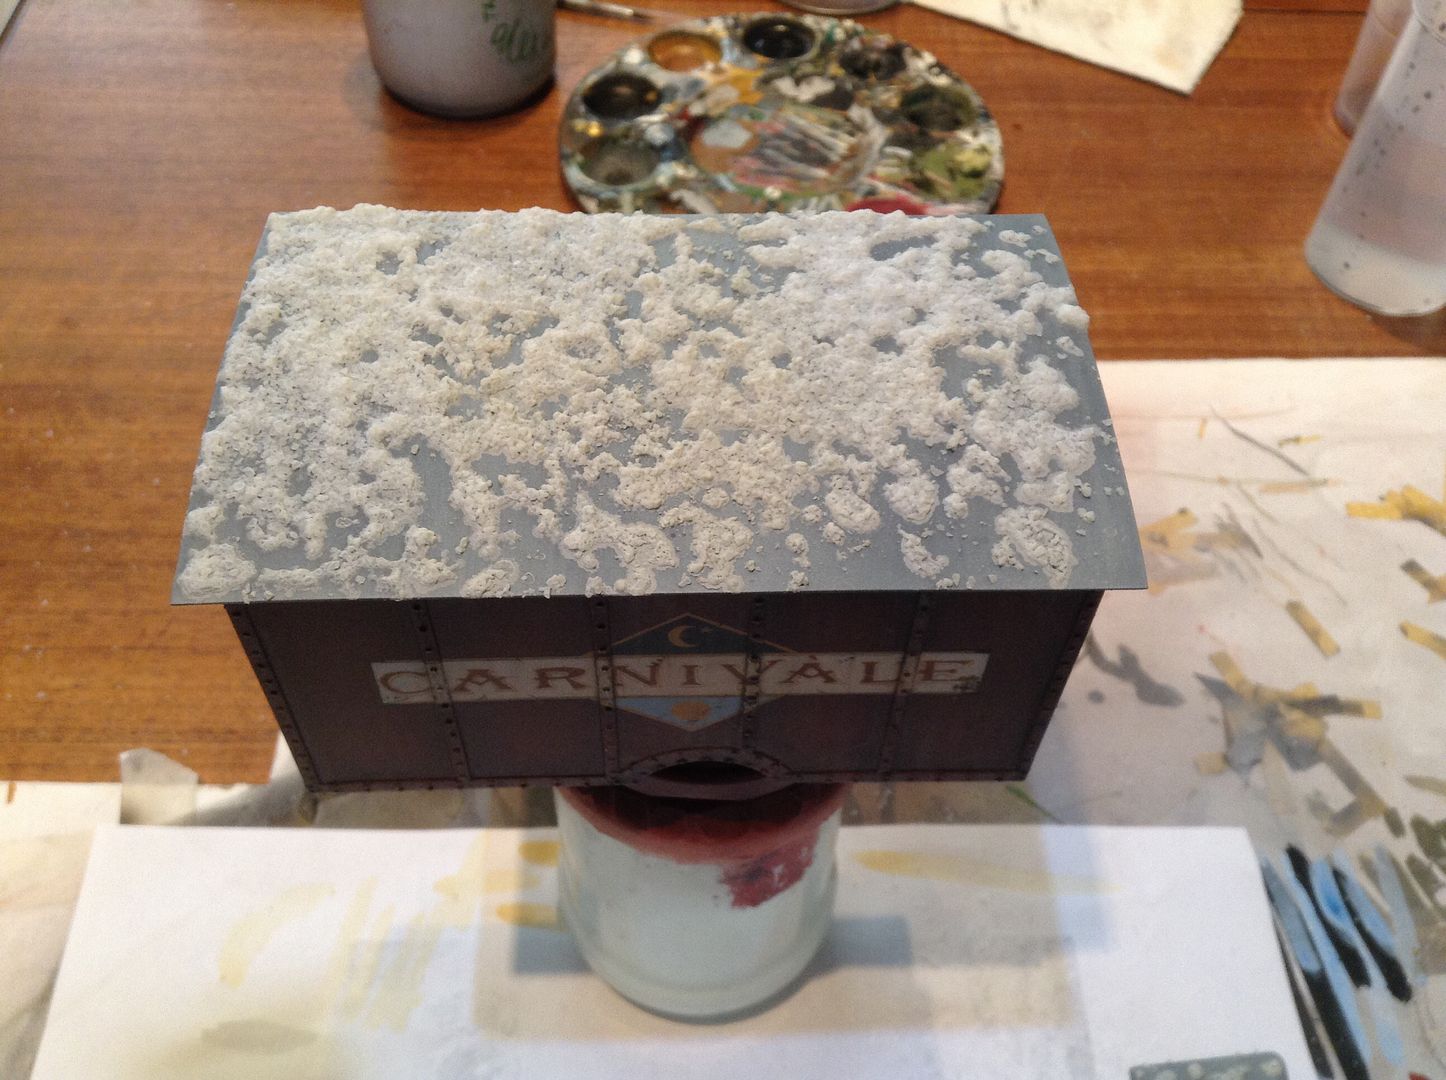
When the paint is fully dry, use a soft brush and some warm water to remove the salt crystals from your model. Go carefully at this stage as you can inadvertently cause little scratches if you're too rough. When you've completely removed the salt crystals, your mapped dirt layer will reveal itself. You can see the underlying streaks are still visible through the random dirt patches, they are unevenly distributed and vary in strength and size- all things that I wanted to help suggest the natural weathering of the roof. The patches are however, too opaque for my tastes (I should've sprayed fewer passes with the paint to make them less obvious)
To make the patches blend in more with the previous paint on the roof, I've applied some streaky oil paint in off-white and dark grey all over the roof. When the white spirit has evaporated, I will blend the oils in better with a soft clean brush, to help disguise and soften the edges of my dirt patches.
I'm pretty pleased with the effect so far, and am positive that it'll look just right after a few more layers of weathering get applied.